“Put Some Mustard On That!” Warm (or cold!) Potato Salad

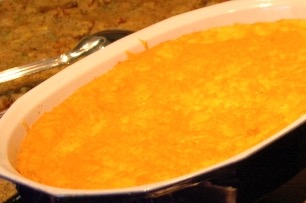
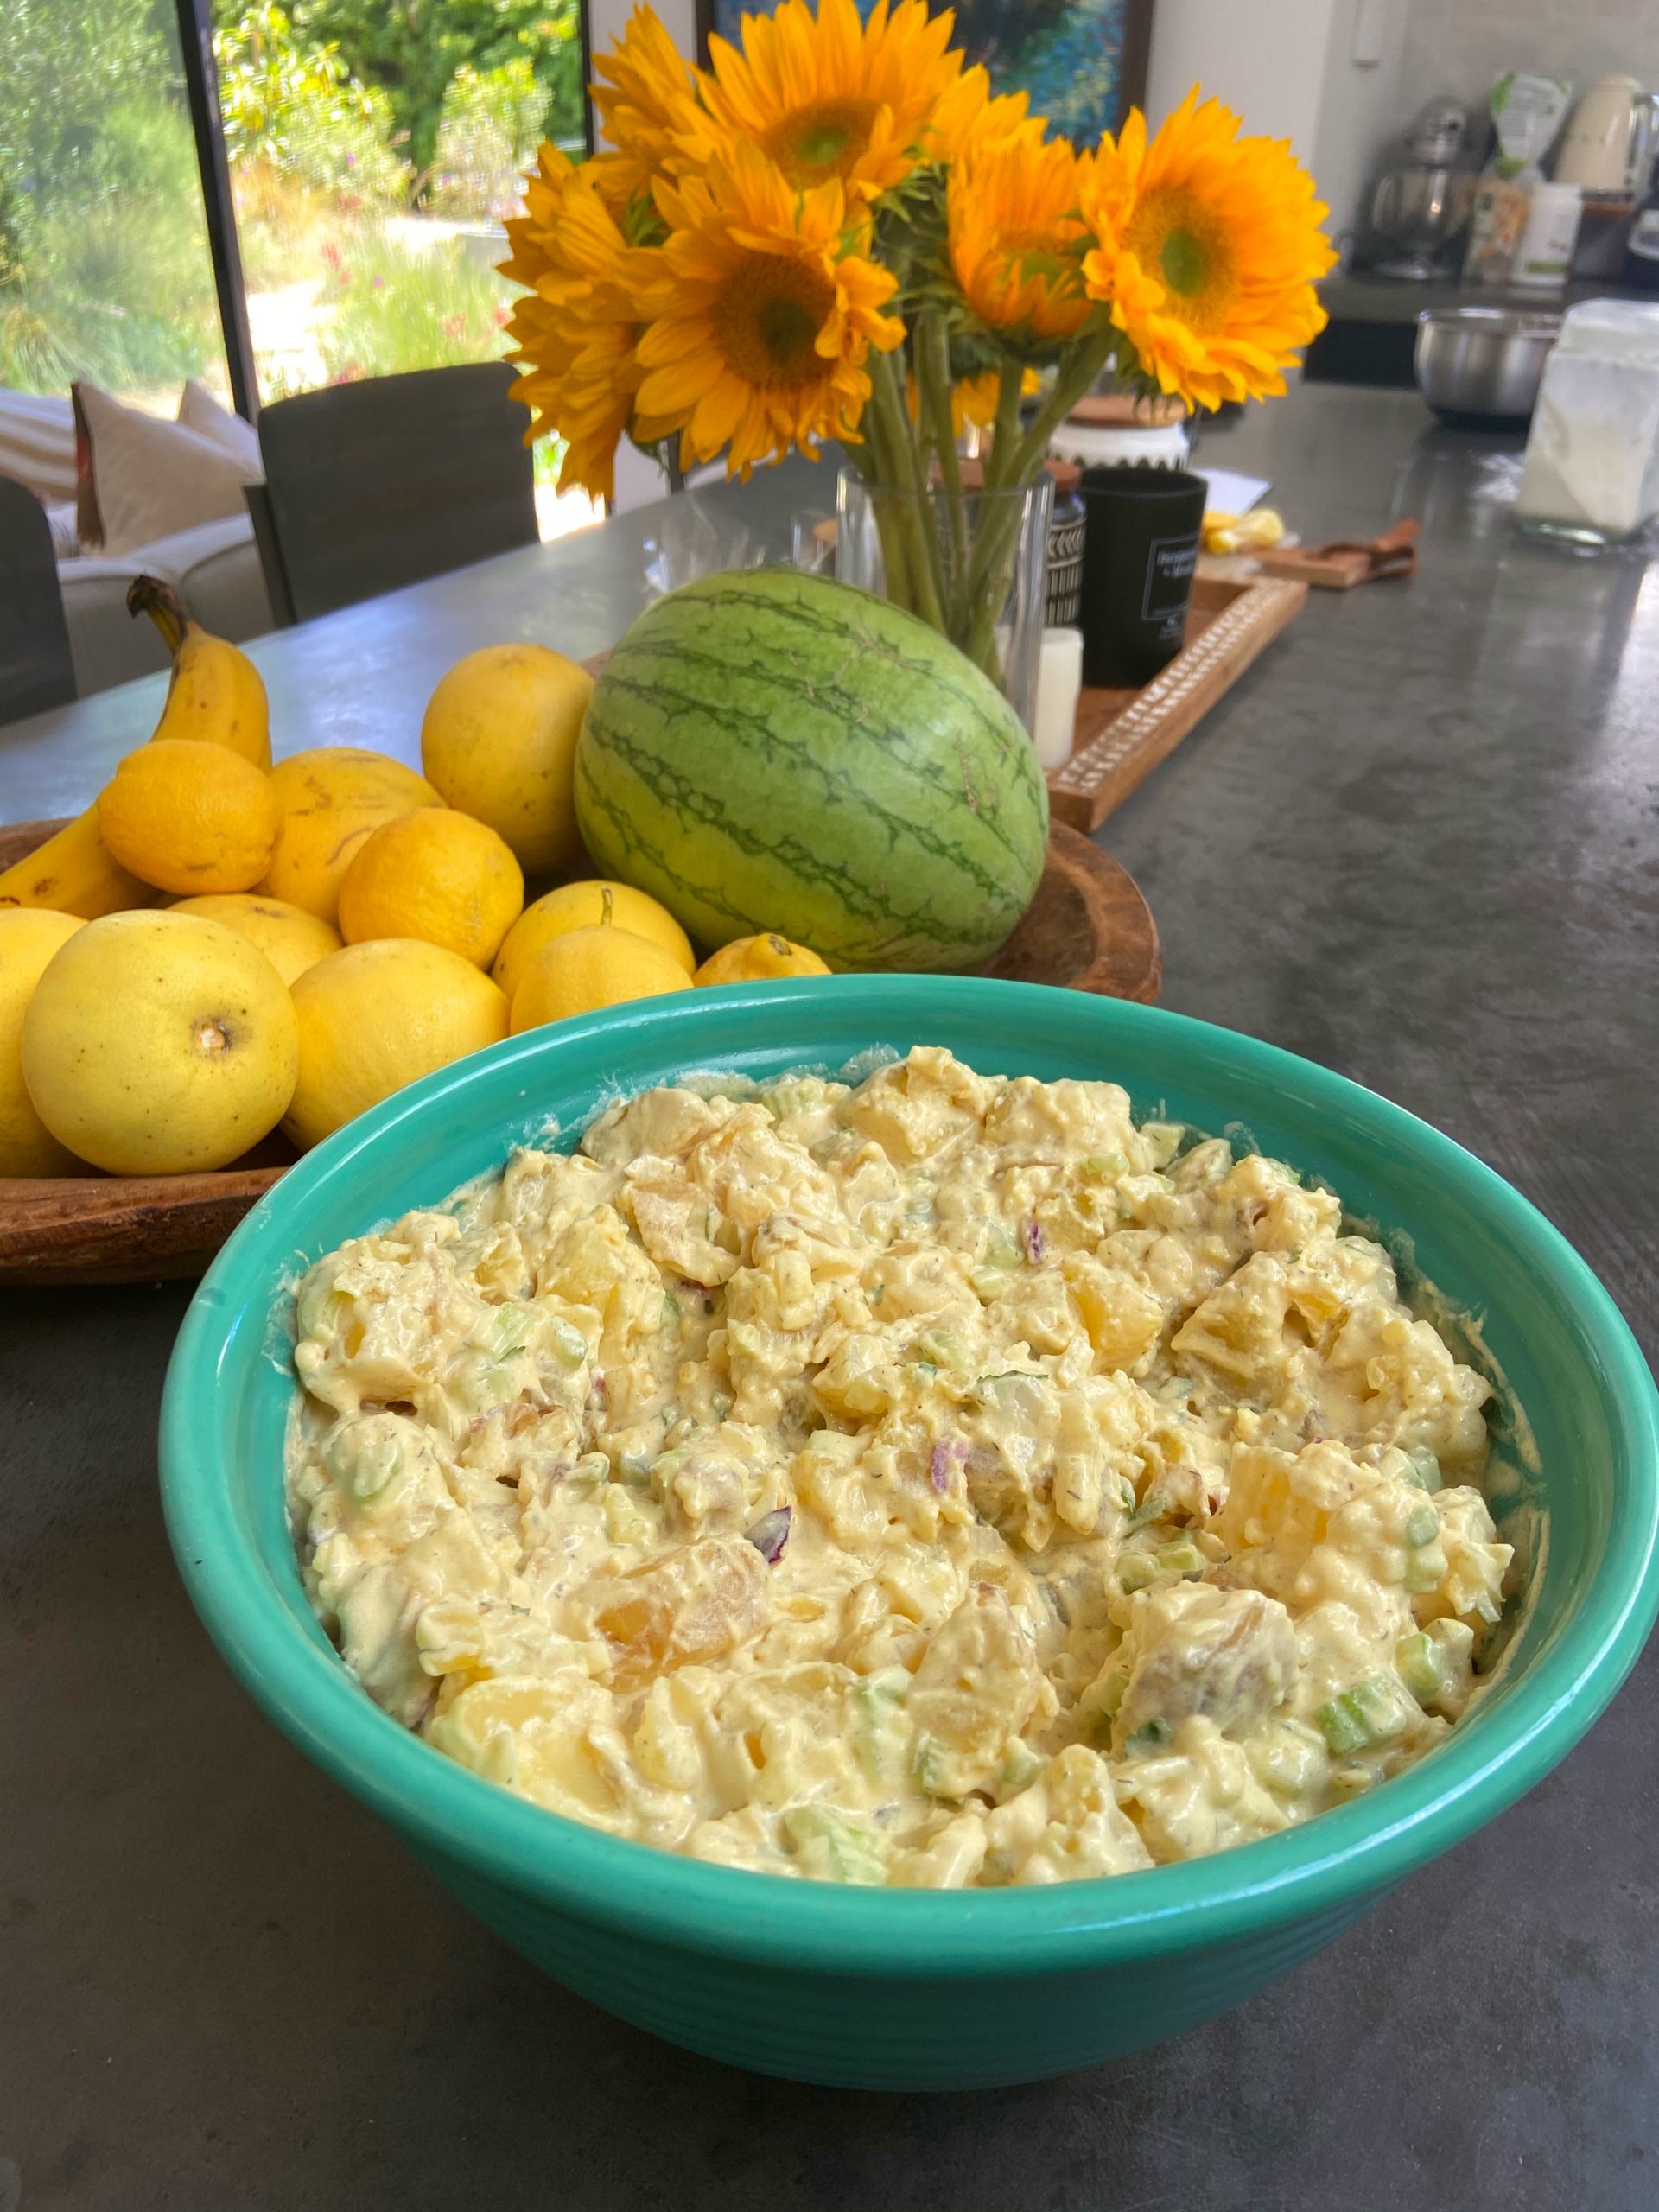
My friend Michelle is an amazing cook. She’s also a fantastic teacher and principal, but cooking has remained a big part of her life, and she has been a wonderful source of information and inspiration for me over the years. This is based on one of her PUBLISHED RECIPES! The only reason my recipes are published is that I make this website! She’s the real deal and you can find the original recipe here . I love this recipe. It’s a fantastic go-to potato salad for dinner or a picnic/bbq lunch. My friend Maggie, who is both a great artist and fantastic cook, took the picture below when she made this for a lunch she was hosting. Thanks Maggie!

Ingredients

2 lbs Small Red Potatoes
cup Mayo
cup Mustard (I use a mix of grain and dijon)
¾ cup Chopped Red Onion
5 Garlic Cloves, Crushed or Chopped
1 tsp Salt
1 tsp Course ground black pepper)
½ Lime, freshly juiced
3 tbsp Freshly chopped dill or parsley or some fresh herbThe original recipe calls for dill, but I prefer the parsley.
3 Green Onions (chopped, for garnish)

Directions

Boil potatoes for 25 minutes – test as they get close. Drain and rinse. If you are a food temperature fanatic (Thermapen fans, unite!) – somewhere between 200 and 210 degrees.

While the potatoes are cooking, prepare the mixture.

Mix all ingredients together except for green onions. This is a mustard heavy version of the recipe. If you’re not a huge mustard fan (I won’t judge), you can replace some of the mustard with Mayo. The original recipe had a 1 cup of mayo and 1/4 cup of mustard.

Cut potatoes into the size you want them. Don’t go too small – the texture is great. I tend to quarter them.

Mix together, add green onions for garnish, and serve warm, or cool down and serve cold. It’s great either way!

Irish Soda Bread

When I was 16, my family ventured to Ireland for a 3-week bike trip.  It was not a tour, but just my adventurous dad leading us around the country.  We camped half the time.  We were always hungry after a big ride, and we would love anything our parents would make at camp.  This is where my dad uttered his wisdom that I repeat often: “There’s nothing like food when you’re hungry!”  Truer words have never been spoken.

When we stayed in bed and breakfasts, which was a nice break from camping, we loved the breakfasts we were served, at least at first. Eggs, bacon (kind of soft, but very tasty), two sausages, a small glass of orange juice, and brown soda bread. After a while, the lack of variety got a little old (definitely a first world problem), but the brown Irish soda bread was something I looked forward to every day.  It filled me up and gave me energy for the day, and I absolutely loved it with good creamy butter.  40+ years later, I still do!

I found this recipe many years ago at recipeland.com.  I have not changed it, and it is a super easy bread to have in the house any time.It makes spectacular toast in the morning, and goes well with any soup or salad.

Enjoy.


Ingredients

3 cups Whole Wheat Flour
1 cup All Purpose Flour
1.50 tsp Salt
1.50 tsp Baking Soda
1 cup Oats (Old Fashioned is best!)
2 tbsp Dark Molasses
2 cups Buttermilk (or milk with 2 Tbsp lemon or white vinegar that sits for 10 minutes)

Directions

Mix whole wheat flour, white flour, baking soda, and salt in a large bowl.

Stir in oats, make a indentation in the middle

Mix buttermilk and molasses together

Pour buttermilk/molasses into middle of dry ingredients. Mix well with sturdy spoon or even your hands.

Knead 4-5 times on a floured surface.

Shape into round loaf, cut the classic cross on top of the bread with a sharp knife – about one inch deep.

Bake at 425 for 15 minutes. We like to bake it on a pizza stone.

Reduce heat to 350 for 30 minutes

Take it out of the oven and let cool. It’s excellent served with butter or reheated as toast.

Skillet Cornbread

I love cornbread. Always have. I’ve gone through phrases in how I made it. My recipe for years was the Marie Calender’s mix, which was a little sweet, but so easy, and really, really good. Then, my mom made this recipe for me a few years ago. It is a non-sweet cornbread with a super crispy kissed-by-butter exterior. And on top of being the best-tasting cornbread I’ve had, it’s yet one more opportunity to utilize your cast iron skillet. Bring this to a pot luck or your own table and once again, you are a hero for the day!

Ingredients

1 cup Yellow CornmealI used Bob's Red Mill Brand Medium Grind Corn Meal
½ cup All Purpose Flour
1 tsp Salt
1 cup ButtermilkIf you don't have buttermilk, you can use milk with 1 lemon squeezed and set aside for 10 minutes, or 1/2 cup sour cream & 1/2 cup milk
½ cup Whole MilkLowfat is OK too. We're a whole milk family.
1 Egg
1 tbsp Baking Powder
½ tsp Baking Soda
1 tbsp Canola Oil
3 tbsp Butter

Directions

Mix Cornmeal, Flour, and Salt in a large bowl.

Add (without stirring) all remaining ingredients except butter and canola oil.

Hand stir (no mixer) and mix well with a large spoon. A few lumps are good. It’s not as thick as you think it should be – thinner than pancake batter – but that’s OK.

Place 9″ or 10″ cast iron skillet and in 450 degree oven for 5 minutes. It will begin to smoke.

Note: If you are doubling the recipe, a 12″ cast iron skillet is perfect.

Take the skillet out, then add butter and canola oil. Let the butter melt, then pour in the cornbread mixture.

Bake for 15-20 minutes at 450 degrees, until the top is brown and the sides pull away from the edges of the skillet. If you are a Thermapen temperature geek like me, the center should be at least 185 degrees.

Pastrami Cheeseburgers

Guy Fieri from Diners, Drive-Ins, and Dives loves a good burger, and so do we! His favorite burger is the Pastrami Burger from a place called Hodad’s in San Diego. Mike Hardin , who ran the place until he recently passed away, had a tatoo of Guy on his thigh. I’m not going to do that. But I’m still a fan, and we will go there one day, have this burger and meet his son who’s now running the place. In the meantime, it’s a good day when pastrami cheeseburgers are happening in my house.

One of the keys to recipes is the amount of mustard you put on the bottom bun of each burger. It’s a lot! But when I was serving these up to my son Ryan and his friends, his friend Dusty said, “Mike. I now know what you’re superpower is. It’s mustard. Nobody else knows the right amount of mustard like you do.” So I got that going for me. Which is nice.

Ingredients

¼ lb hamburger per person. 85/15 is the leanest you should go.I usually make 1/3 pound burgers, but there's so much pastrami, a thin patty works out great.
¼ lb Beef Pastrami, per person. Thinly sliced from your favorite deli. Get more than this, and make some great sandwiches this week.
1 Slice cheese per person, swiss is nice here, but choose your own.
½ Onion, sliced, per person
1 Soft Hamburger Bun, per person. Brioche buns are hot right now, but find a good one.
Mustard, Yellow, Dijon, Spice – the one you like the most with pastrami or a burger.
Ketchup
Soy Sauce
Montreal Steak Seasoning

Directions

Season burgers like you season steaks. Soy sauce and Montreal Steak Seasoning.

Slice onion thinly and saute in olive oil until nice and browned. Take them out and set aside.

Grill the burger to your satisfaction. I’m a medium well to well done burger guy. Please don’t judge. I like the outdoor bbq grill more, but you can use a griddle or cast iron skillet indoors. That’s how Hodad’s does it.

Just before the burger is done, heat the thinly sliced pastrami. I do this in the cast iron skillet with a tiny bit of oil.

Add cheese to the burger, close the lid, and let it melt for no more than 1 minute.

Assembling the burger

Start with the bottom half of the bun. Put twice as much mustard as you usually put on a burger. Twice. May be 2 and a half times. Go big.

Put the burger with cheese on the mustard-laden bottom bun. Add enough pastrami to make a decent-sized pastrami sandwich. Not a NY Deli sized pastrami sandwich, but enough to be good by itself.

Add the grilled onions. This is a big burger!

Put a normal sized amount of ketchup on top, place the bun, slice in half if you want, and you are ready to go!

Lemon Chicken

This is another recipe I grew up with. I remember watching Mom make it all in the pan, and it was soft and buttery chicken that was filling and wonderful.   She would serve it with her brown rice recipe, making quite a meal. I was a pretty lucky kid. This is now my son Dawson’s favorite chicken recipe.  He asks for it when he has friends over for dinner!  I could not ask for higher praise!

Ingredients

1 cup White Flour
2 tsp Salt
2 tsp Black Pepper
2 tbsp Italian Seasoning
2 lbs Boneless chicken breasts or cutlets
2 cups Chicken Broth
3 Lemons, quartered
Olive Oil and Butter
2 tbsp Parsley

Directions

Sprinkle salt and pepper, or seasoned salt, on the chicken as you prepare everything else. This dry brining time makes a difference every time you cook chicken. It’s better with 5 minutes of it, and way better with an hour or more.

Mix Flour, Salt, Pepper and Italian Seasoning.

Take chicken pieces and roll in flour mixture.

Heat large skillet, add 2 Tbsp Butter and 2 Tbsp Olive Oil. Add chicken to hot oil/butter. Saute until brown on each side – about 5 minutes on each side. Remove and set aside.

Deglaze pan by adding all broth and stirring, scraping all chicken pieces off the bottom. Heat the mixture.

Return chicken to the hot broth. Squeeze 6 quarters of lemon juice into it. Leave some of the rinds in there – they add to the flavor and make the dish look way better. Sprinkle with parsley. Simmer. Turn every 5 minutes.

The chicken is ready when the chicken reaches 165 degrees. Use a Thermapen or other meat thermometer.

Take the chicken out. If you want to thicken the broth, take out a cup and mix in 1 Tbsp of Corn Starch, mix well and return to broth.

Serve the chicken on a plate, spoon some broth over it, and squeeze a little more lemon on it. Dawson likes to have it with a “sidecar” of the thickened broth.

Chicken and Biscuits

When I was in high school, I often came home from school very late during swim season. I would miss the family dinner, but my Mom always had food waiting for me. One oof my favorites was chicken and dumplings. There are many recipes in the same family. A hot and thick stew with chicken and vegetables, with either dumplings, pie crust, or biscuits. Over time, I have fallen more and more in love with biscuits, so why not eat them whenever you can. (Other than the obvious caloric reasons, which we should not even mention here!)

This recipe is a combination of Ina Garten’s chicken stew and Joanna Gaines’ biscuits.

Ingredients

1 Rotisserie Chicken (Hard to beat Costco’s)(That's about 5 or 6 cups of chicken!)
5 cups Chicken Stock
2 cups Onions, chopped
4 Stalks of Celery, washed and chopped
¾ cup Flour
6 Carrots, peeled and chopped
1.50 cups Frozen Small OnionsI love these – you don't need them, but they make the dish look way better!
1 cup Fresh or Frozen Peas
½ cup Fresh Parsley
Salt, Pepper
12 tbsp Butter (1 and a half sticks)

Directions

Preparing the Stew

Take the meat off of the Rotisserie Chicken., and put the carcass in just enough water to cover it up. Add some onions, carrots, celery and a bay leaf, boil then simmer for 90 – 120 minutes, and you will have an outstanding broth. 90 Minutes

Begin the stew by making a roux. Melt 1.5 sticks of butter in a stock pot, add 2 chopped onions and chopped celery and sauté for 10 minutes or a little longer. Add the flour and stir for two minutes until it is quite thick.

Gradually add 5 cups hot chicken stock to the roux , stirring all along. Simmer and heat for 3-5 minutes.

Add carrots, peas, chicken, small whole onions and parsley. Add salt and pepper to taste. Start with 1 tsp pepper and 1 tsp salt. For me, it depends on the saltiness of the broth. Feel it from there! Ina’s original recipe called for some half and half to add creaminess , but I really don’t think you need it. Put aside until you are ready to cook. You can refrigerate this at this point.*

Making the Biscuits

Just follow my adaptation of Joanna Gaines biscuit recipe .

Putting It All Together

When you are ready to cook, place the stew in a healthy big casserole dish (a little deeper than a normal 9×13 if you have it) and heat it until it is quite warm. This may take 15-25 minutes in a 350 degree oven.

After the stew is warm, place the biscuits on top and bake for another 30 minutes.

Take out and serve with a nice salad, or, since it has all the food groups in there (biscuits and everything else) just serve it on its own.

Gramma Sue’s Spaghetti Sauce

I used to host Pasta Feeds before doing triathlons. (By “doing” I mean surviving. I didn’t care what place I finished but I did like that I could finish!) It was one of the only good reasons I had for doing triathlons! I usually finished in the top 10% in the swim, top half in the bike, and bottom 0.1% in the run. Oh well – At least I got to make Mom’s spaghetti sauce for my friends the night before.

I remember coming home from swim practice in high school and eating 4 helpings of this. Those were the days! This old fashioned hearty tomato sauce is simple to make. It can simmer all day and make the house smell wonderful. And it’s great with leftovers. Thanks Mom!

Ingredients

1 lb Ground BeefYou can also use Italian Sausage, or some combination of both.
1 Onion, chopped
1 Large Can Crushed Tomatoes (28 oz)
12 oz Tomato Paste
12 oz Water or Red Wine
6 Garlic Cloves, chopped
1 tsp Oregano
1 tsp Italian Seasoning
1 tsp Salt
1 tsp Black Pepper
2 tbsp Dried Parsley
0.50 tsp Fennel Seed (or pinch of ground fennel)*(You don't have to have this, but for me it's a really nice addition. Fennel is a key ingredient in most Italian sausages, and it blends in nicely to this sauce.)

Directions

Brown Ground Beef and onions together, adding garlic in the last two minutes. Drain, or for a little more flavor, just spoon out the excess fat.

Add everything together (Godfather style) and simmer for at least one hour.

Cheese Grits

grits-sprouts-dressing

Growing up in the South, you didn’t ask for grits at a breakfast restaurant. They just came with the bacon and eggs. They are a cheap and filling food, and have just been part of southern menus for a long time. I do not crave grits. But cheese grits, that’s a different story. My mom always made cheese grits. They’re way better than just grits, far beyond ordinary, and deserving of a special place at the table.

Using non-instant grits is critical. If you are an oatmeal fan, then you should not be a fan of instant oatmeal. Instant oatmeal is a bunch of nothing. Steel cut or the whole grain oatmeal, the stuff that takes at least 10 minutes to cook, is the way to go. Same thing with grits. Get yourself some good stone ground grits (my favorite brand is Bob’s Red Mill), and you are ready to go. We serve this for dinners, pot lucks, and it’s even a staple on our Thanksgiving table.

Ingredients

1.50 cups Stone Ground Grits*We love Bob's Red Mill brand for all of our grains. See amount note in the directions. You want the right amount of grits to mix into six cups of water.
6 cups Boiling Water with 1 tsp saltYou can use a vegetable or chicken stock if you want more flavor.
4 cups Sharp Cheddar Cheese, grated
3 Eggs, beaten
8 tbsp Butter (1 stick)
2 tsp Kosher Salt
2 tsp Pepper, Black
1 tbsp Chili Garlic Sauce (Optional)

Directions

Cook the grits in boiling water until they reach a consistency where they won’t run off your plate and turn off heat.

Note: different grits have different measurements. Choose the right amount of grits to cook in 6 cups of water. Use some Common Core math skills here!

Add butter, and stir in until it is melted and blended.

Beat eggs in a small bowl, then spoon in some of the hot grits into the eggs and mix together (this keeps the eggs from cooking into scrambled eggs). Add back to grits and stir.

Mix in all but one cup of the shredded cheese.

Stir in salt, pepper, and if you want some spice (and you should!), the chili-garlic Sauce or your favorite hot sauce.

Prepare a nice casserole dish. A 13″ x 9″ size (3 quarts) is right. If you are using a deeper dish, you will need to bake a little longer. Use some butter or cooking spray and you’re set.

Pour the grits into the dish. You can refrigerate overnight at this point, or just go right to the next step.

When you are ready to bake, sprinkle cheese on the top. Bake at 350 degrees (325 convection) for 1 hour and 15 minutes, until just barely browned and the grits are set. 75 Minutes

Oatmeal Chocolate Chip Cookies

It’s not often that a dad gets to be a hero. But every time I get two sticks of salted butter out of the refrigerator and ceremoniously lay (or for more effect, slap) them out to soften, there is an audible cheer in the house. They’re that good. And it’s just the old (not the updated!) version of the Quaker Oats recipe, with a few ever so slight changes.

So here’s the thing. If you buy a cardboard cannister of Quaker Oats, you still find the recipe for their “Vanishing Oatmeal Cookies” on the underside of the lid. But don’t be fooled. It’s the updated version, with way less butter. As the drive-in movie review columnist Joe Bob Briggs says, “Communist Alert!” As any chef, more butter is better. So let’s stick with the old recipe, get rid of those pesky raisins, and add some chocolate chips. Here’s my recipe.

Ingredients

3 cups Quaker Oats (Old Fashioned are the best)
1.50 cups White Flour
¾ tsp Kosher Salt
1 tsp Baking Soda
1 tsp Cinnamon
1 cup Butter (Two Sticks), Softened
1 cup Brown Sugar
½ cup White Granulated Sugar
2 Eggs
1 tsp Vanilla
1 cup Chocolate Chips, Semisweet

Directions

Mix Dry Ingredients (First Five) in a bowl.

In a mixer, mix butter and sugar. Beat until smooth. Mix in eggs and vanilla.

Mix wet and dry ingredients in one bowl.

Add chocolate chips and mix in.

Bake for 10 minutes in 325 degree convection oven, or 350 degrees regular oven. Removed when browned.

Cool on rack, then serve while they are still warm.

If you want to save dough, wrap in wax paper, then place in plastic bag. Thaw for at least 30 minutes before cooking.

Jilly’s Mini Pumpkin Pies

Once the Halloween Tree goes up, it’s time for Jilly’s Mini Pumpkin Pies! My wife Jill is an inventor. She has invented so many things over her life, the smartphone for example. She was way ahead of Steve Jobs. In 2003, long before the first iPhone in 2007, when she was holding her Treo 300 Palm Pilot in one hand, and her cell phone in the other, she knew they should be merged as one. We don’t make a lot of money off of her inventions, but we enjoy it when someone else finally figures it out.

These mini-pumpkin pies may be one of her greatest inventions. A friend of ours published the recipe in a cookbook, but did not give Jill credit. She’s OK with that, but come on! I bet we make five or six batches of this every fall. They’re a great dessert, breakfast, snack, or whatever you want them to be.

And here’s how I eat them. I peel away the muffin liner, hold the mini-pie in my hand, put whipped cream on top of that, and eat it in three bites. Let us know what style works best for you!

Oh! And that picture below? That’s Jill getting the honor of putting the witch on top of the old Halloween Tree! Wait. You don’t all do that? Our holiday tree comes out in October and becomes a Halloween Tree, then a Thanksgiving Tree, then a Christmas Tree. And if I had it my way, it would stay up the whole year long, arborally celebrating the different holidays. Alas, like many things in my home, I don’t get it my way, and I live with nine, sad, holiday treeless months. But I can’t wait for October!

Ingredients

1 14.5 oz Can Pumpkin – We Like Libby’s
1 Can, Sweetened Condensed Milk
2 tsp Pumpkin Pie SpiceWe think McCormick's is the best brand for this
2 Eggs
28 Ginger SnapsThe Nabisco Ginger Snaps are perfect.
Whipped CreamI usually like homemade, but the spray can works so well here.

Directions

Mix pumpkin, sweetened condensed milk, pumpkin pie spice, and eggs in a mixer or with a spoon.

(Note: If you want to make a big pie, just pour this into a pie crust and bake at 425 degrees for 15 minutes, then 350 degrees for 30-40 minutes, until a knife/toothpick comes out cleanly.)

Put a Gingersnap in the bottom of 28 foil cupcake cups arranged on 8.5 x 13 casserole dishes. Put 1/4 cup mix in each cupcake cup.

Bake at 425 for 15 minutes, then at 350 for 20 minutes.

Let cool. Then serve with whipped cream!

Quick Veggie Soup

A quick veggie soup is a nice recipe to have in reserve. It can be a light lunch or dinner, an appetizer, or you can add some pasta and make it a more filling minestrone like soup. It’s remarkably simple and quick.  Jill made it for me recently when I was sick and it was fantastic!

Ingredients

4 cups Organic Vegetable Broth
5 Carrots, Large, Peeled and Chopped
1 Onion, small, quartered and separated
6 New Potatoes
1 Bay Leaf
1 tsp Salt
¼ tsp Crushed Red Pepper
3 Garlic Cloves, Pressed or Crushed
1 tsp Black Pepper

Directions

Add broth and all ingredients until the potatoes are soft – about 20 minutes.

Scoop out most of the solid ingredients (with a little broth), and place in blender. Puree.

Mix back with the broth and you’re ready. Add some avocado and/or pepitas for great toppings!

Gramma Sue’s Rice Pudding

Every time my son Ryan (born in 1990!) goes to Gramma Sue’s house, or whenever she visits us, the first order of business for her is to make Rice Pudding for Ryan. Now Dawson is in on it too. It’s a great tradition, and a fantastic dessert. Also, it’s a superb breakfast reheated. Serve it whipped cream and you’ll be pretty darn happy.

Ingredients

1.75 cups Water
2 cups Whole Milk
½ cup Converted RiceI am going to try this recipe with some jasmine rice, as I don't have converted rice around the house.
2 Eggs, beaten
½ tsp Salt
cup Sugar
¼ cup Raisins (more or less, to taste)
1 tsp Vanilla
Cinnamon

Directions

Preheat oven to 350 degrees.

On the stove, bring water to boil; stir in rice and salt. Cover and simmer 30 minutes until water is absorbed.

Add milk and boil gently, stirring occasionally, until mixture thickens slightly, about 5 minutes.

Combine eggs, sugar and vanilla in bowl. Gradually stir into rice mixture; mix well.

Pour into a greased 1-1/2 qt. (3 qt., if doubled) casserole. Stir in raisins and sprinkle with cinnamon.

Bake uncovered, for 45 to 50 minutes. Test for doneness by inserting a knife – if it comes out clean, you are done!